
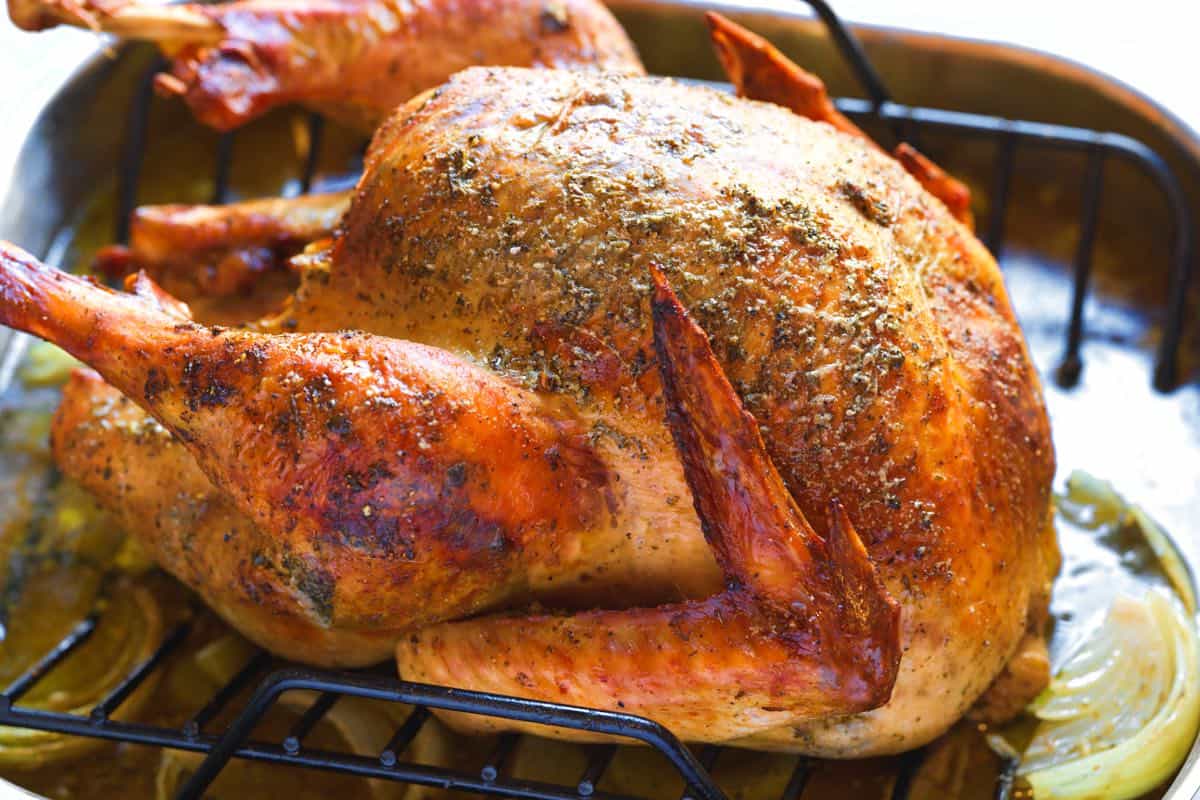
This roasted turkey recipe guarantees incredible flavor, juicy, tender meat, and golden-brown crispy skin. Perfect for anyone preparing a turkey, especially for Thanksgiving!
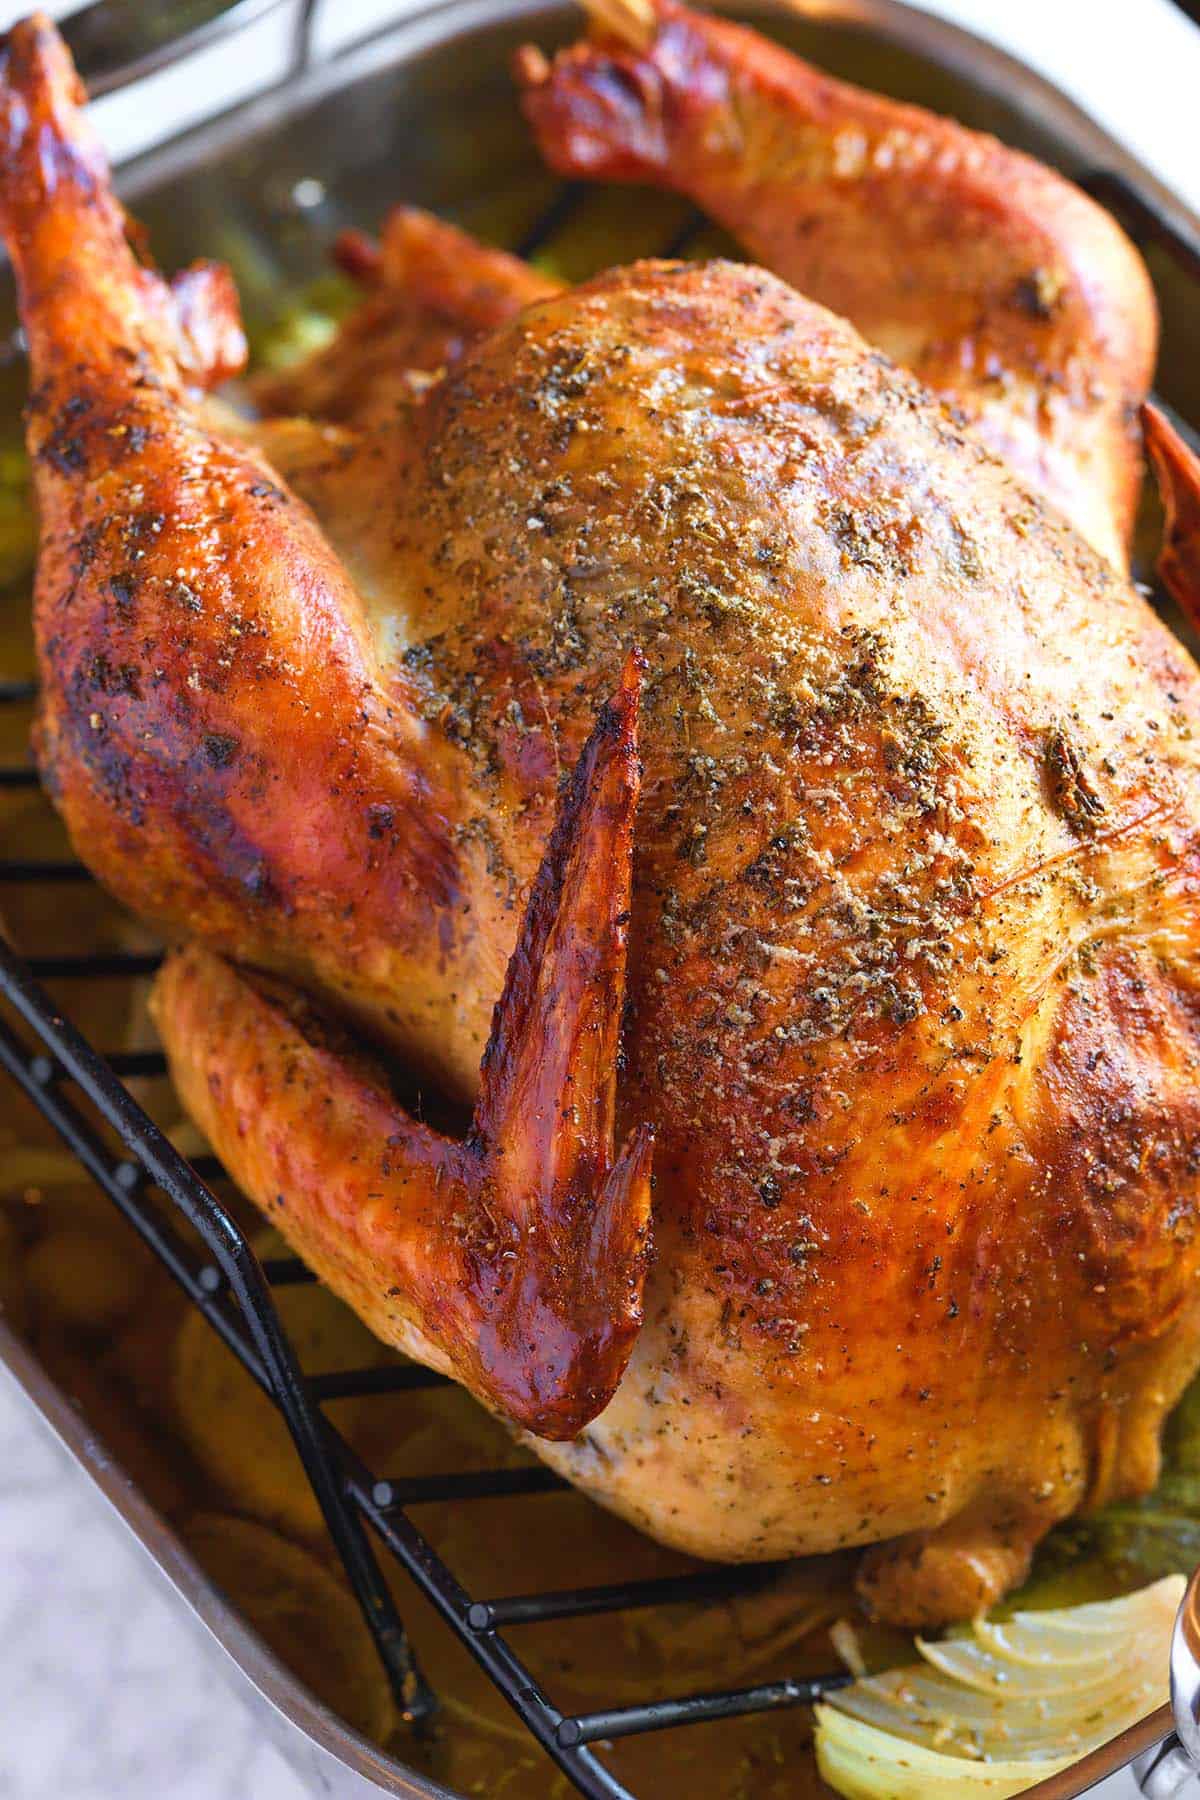
We don’t roast turkey very often, but when we do, we go all in. My secret weapon is our homemade turkey butter, packed with butter, garlic, and herbs. We tuck it under the skin for incredible flavor, color, and moisture, then brush it all over the outside. It’s a lot of butter, but trust me, it’s worth it!
This is my favorite turkey recipe for Thanksgiving, but you can enjoy it any time of year. For smaller gatherings, use our recipe for garlic herb roasted turkey breast.
Thanksgiving Turkey Timeline
If you are like us, you don’t roast many turkeys throughout the year. Most of us really only make them around the holiday season. Here’s our timeline for thawing, brining, and roasting. I will use Thursday as our goal since that’s how Thanksgiving falls in the US, but you can move the days around to fit your intended roasting day.
This timeline assumes a thawed turkey. I’ve shared our tips for thawing below.
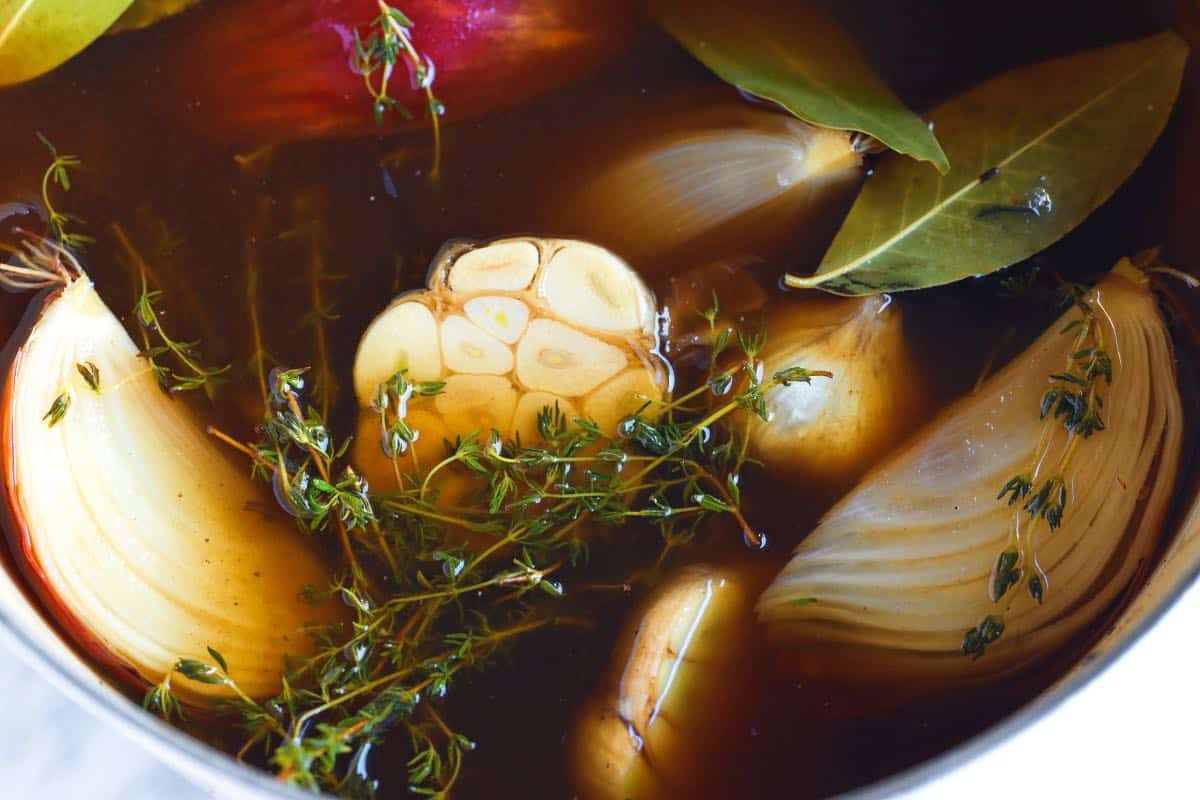
- Monday: Brine the turkey (yep, we brine our bird and love it). Here’s my favorite turkey brine, which I use in our video.
- Wednesday night: Remove turkey from brine, and air-dry in the refrigerator overnight (for best crispy skin)
- Thursday: Roast the turkey, allowing approximately 14 minutes per pound, in an oven preheated to 325°F (162°C). Our recipe is below!
How to Make the Best Thanksgiving Turkey
Tip 1: Use our herb butter. The key to the best juicy whole roasted turkey is fat. Everyone wants juicy turkey, but the truth is that turkey is lean. That’s why we recommend using lots of our herb butter. Most of the year, you won’t catch me stuffing this much butter into anything, but I make an exception for this recipe, especially when I’m using it for Thanksgiving turkey.

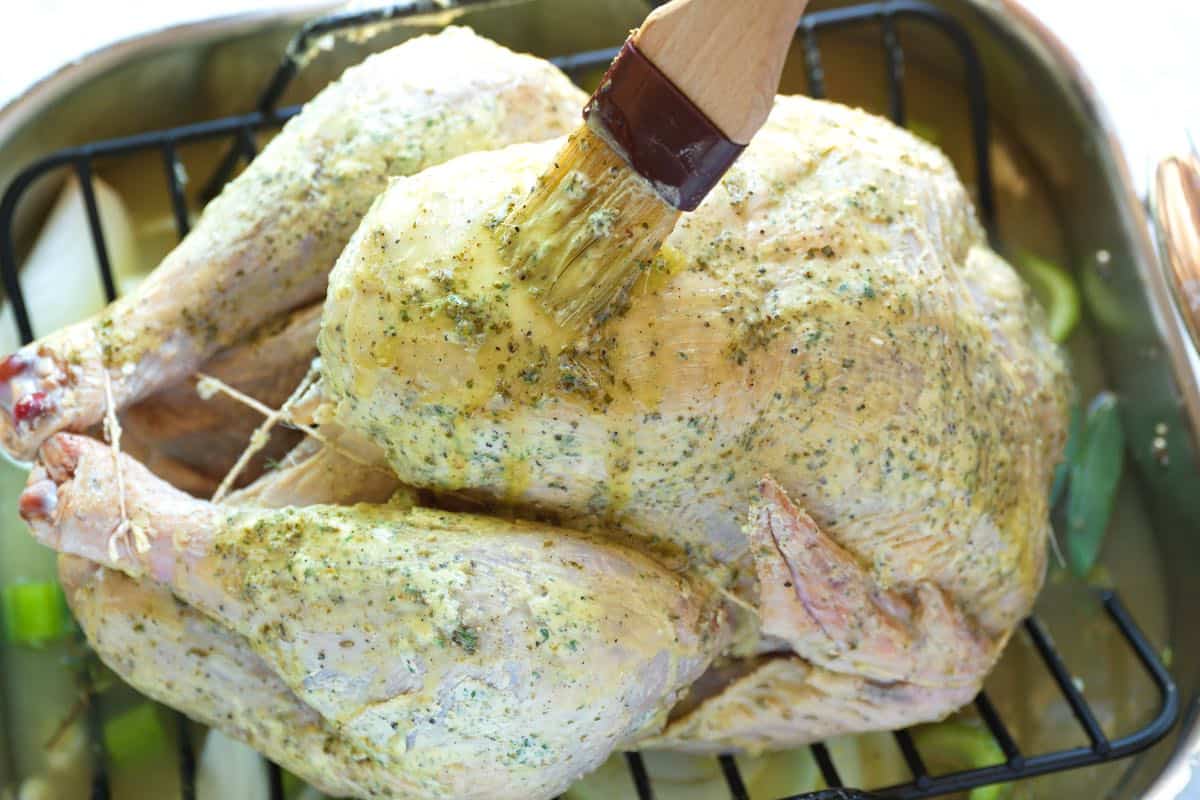
Tip 2: Baste with fat, not broth. I baste my turkey while it roasts in the oven. Basting fat over the skin keeps it moist and flavorful. Notice I said basting fat. That’s the important part. Spooning broth over the skin doesn’t do much. You need to spoon over the fat! A baster is your friend here. Use it to scoop up the layer of fat that sits on top of the broth in the roasting pan. That fat will work wonders for the skin. I baste my turkey every 30 minutes or so.


Tip 3: Determining your cook time. I roast in an oven preheated to 325°F (160°C). The cooking time depends on the size of your turkey and your oven. You want to roast a whole turkey for about 14 minutes per pound. So, a 15-pound turkey will roast for 3 ½ hours.
Tip 4: How to tell it’s done. The best way to know if a turkey is done is to use a food thermometer. Check the temperature in several spots, especially in the thickest part of the thigh, avoiding the bone. It’s wise to check both sides.
I remove my turkey from the oven when its internal temperature reaches 160°F. The USDA recommends 165°F, but in my experience, carry-over cooking raises the temperature further. As a visual cue, you want to roast until the juices run clear from the thigh after piercing it with a knife.
Tip 5: Let it rest. Once the turkey is out of the oven, let it rest for at least 30 minutes and up to an hour. Lightly covering it with foil will keep it hot before you carve it. If you need to keep it warm for over an hour, place it in an oven set to 200°F (90°C) and cover it with foil to prevent it from drying out.
Extra Tips and Tricks for the Best Roast Turkey
I want you to feel extra confident, so here are a few more tips to help you out. They may not all be relevant to you, but I’ll share anyway.
Thawing a whole turkey. To safely thaw, do it in the refrigerator. Plan on 24 hours in the fridge for every 4 to 5 pounds. A 15-pound turkey will take 3 to 4 days to thaw, so you would begin thawing it on Thursday before Thanksgiving.
To speed up thawing, you can submerge it in cold water (allow 30 minutes of thawing per pound). Change the cold water every 30 minutes, and if your turkey is not completely covered, rotate it every 30 minutes to keep it chilled. A well-insulated cooler is helpful for this.
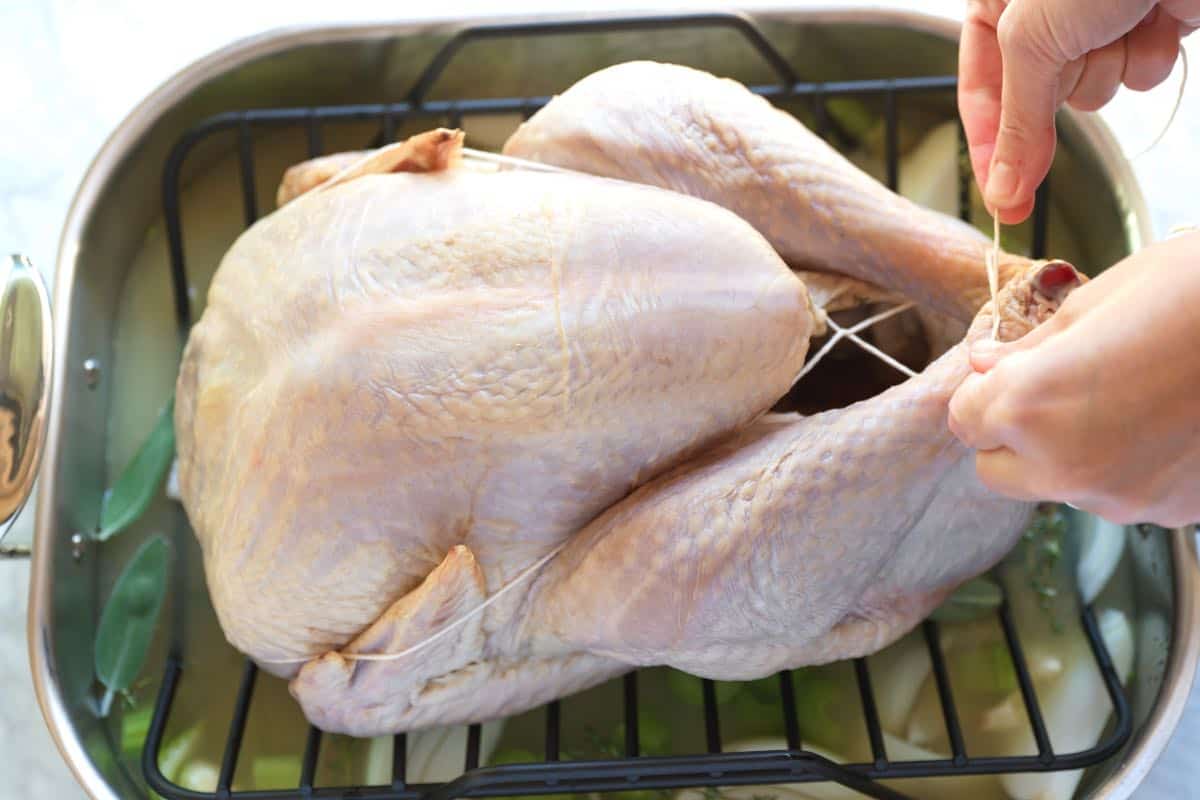
Trussing a turkey. While not required, this helps it roast evenly, so I prefer to truss our turkey before roasting. To do it, position twine around the bird, tucking it slightly underneath the neck end. Bring the twine up and around the wings, pushing them towards the breast. Cross the twine at the cavity, forming an X, and then tie the ends of the drumsticks together.

Brining a turkey. When roasting turkey, we prefer to brine it and highly recommend that you do, too. Don’t think of brining as a way to keep your turkey moist and juicy. Instead, brining is for FLAVOR and TEXTURE. Brined turkey is more flavorful and tender. We wrote a helpful article about brining a turkey with photos and a video showing how we do it.

Stuffing a turkey. We do not stuff turkey or recommend it. It’s an excellent way to overcook your turkey since the stuffing will often take longer to come to temperature than the turkey itself. Keep stuffing on the side.
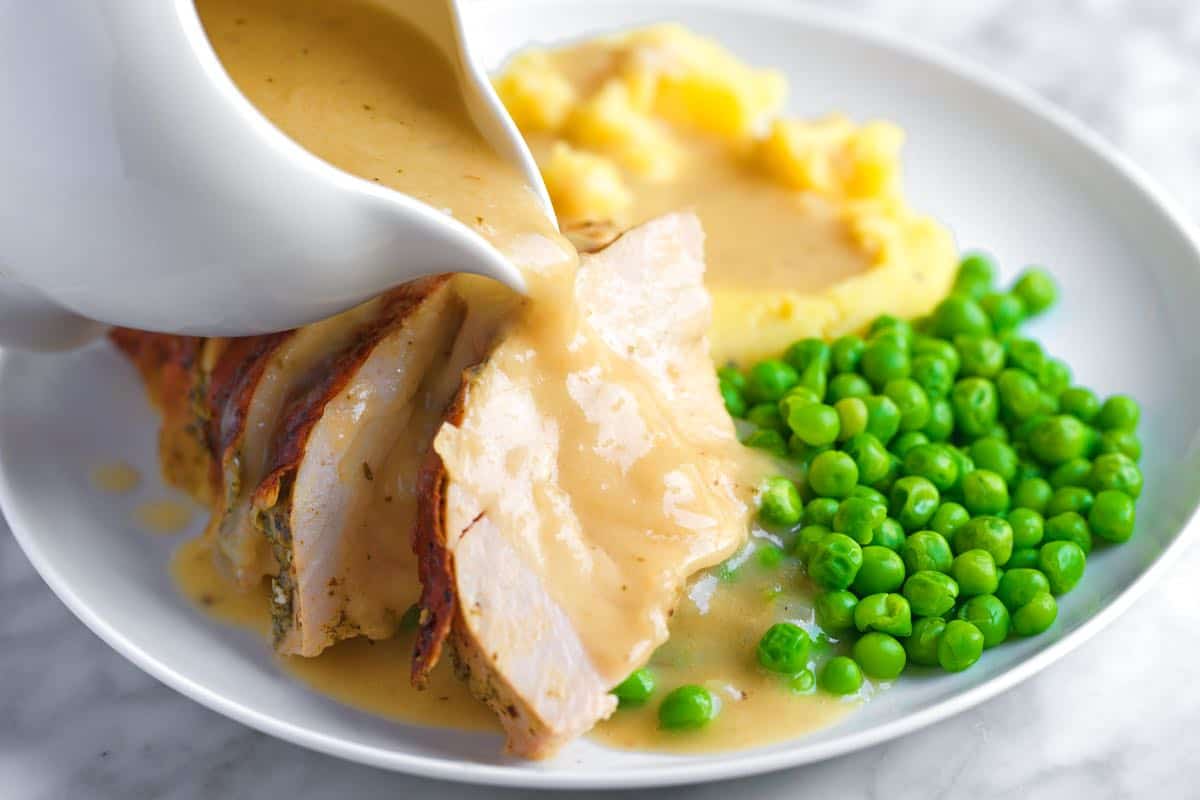
Make our turkey gravy. I use only one gravy recipe for Thanksgiving, and it’s the one shared in our video. To make the gravy in our video and photos, use this turkey gravy recipe that uses all those delicious pan drippings!


Popular Thanksgiving Side Dishes
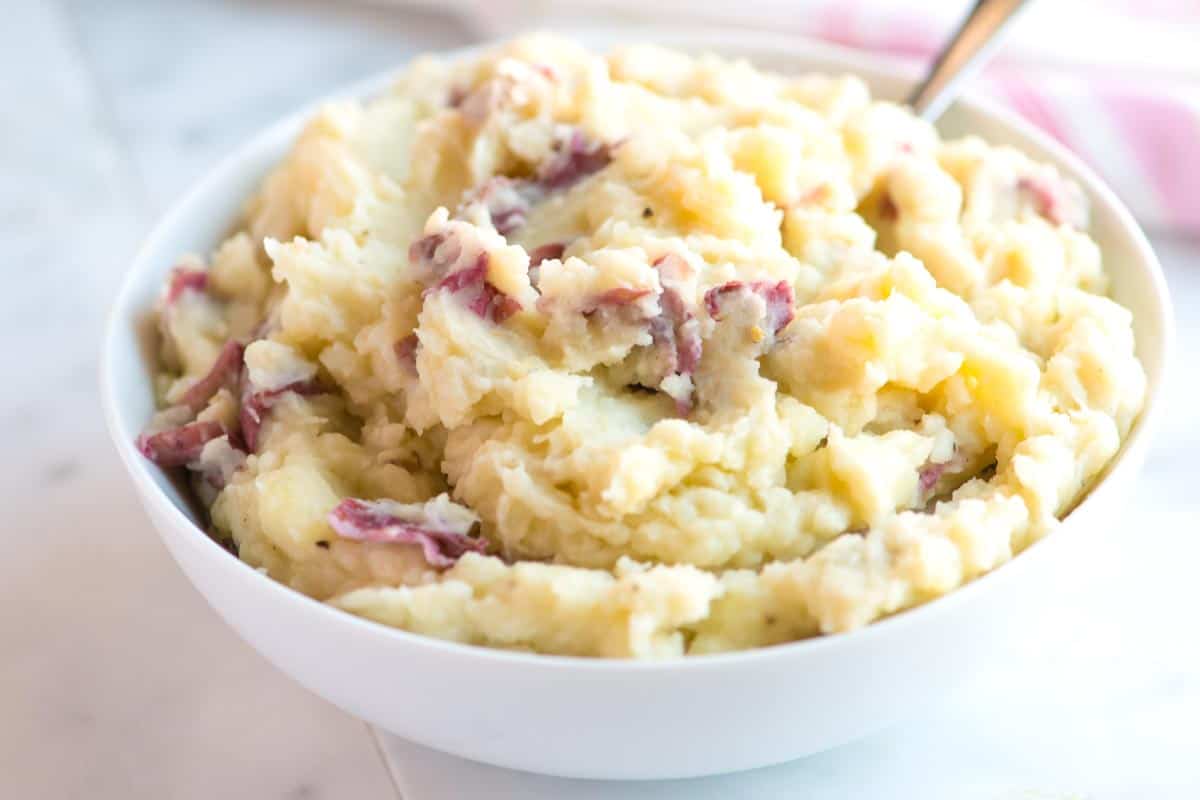
- Classic Mashed Potatoes
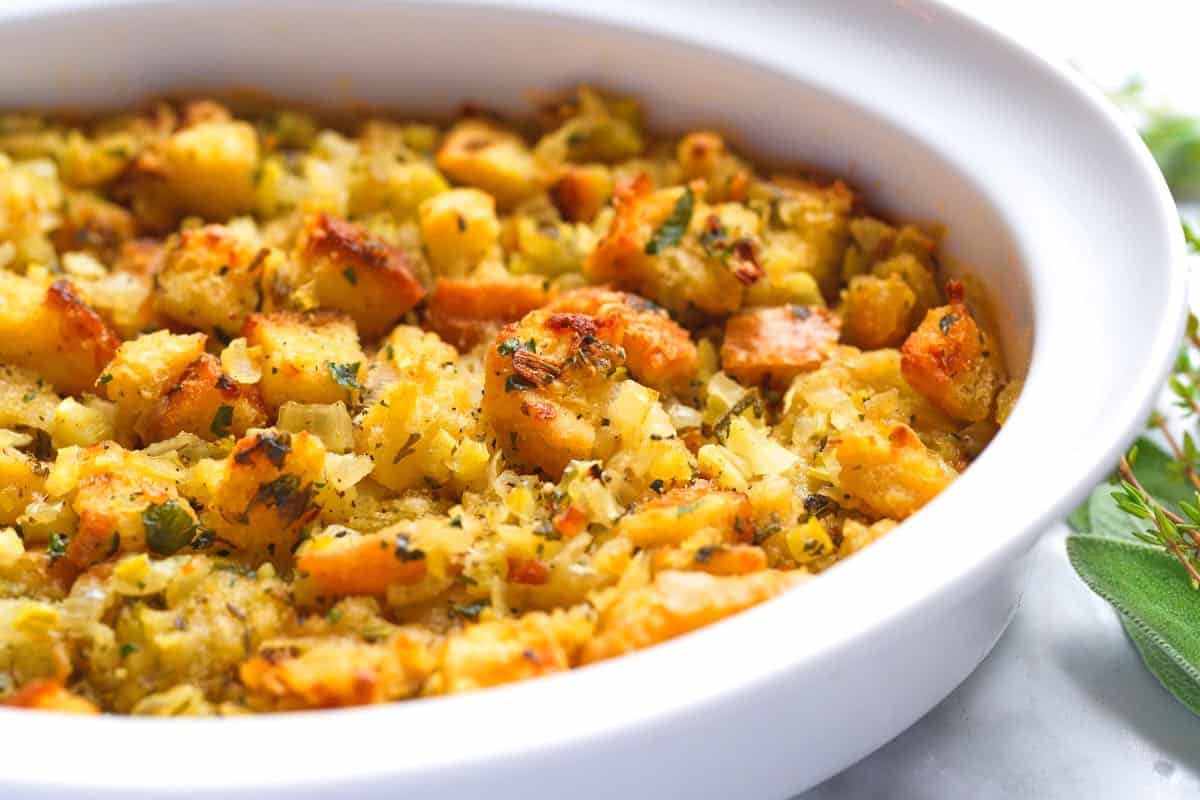
- Mushroom Stuffing or Easy Herb Stuffing
- Green Bean Casserole
- From Scratch Turkey Gravy (with pan drippings) or Easy Gravy (without pan drippings)
- Creamy Mac and Cheese or Baked Mac and Cheese
- Garlic Roasted Brussels Sprouts
- Parmesan Roasted Delicata Squash
- Easy Roasted Carrots
- Scalloped Potatoes or Au Gratin Potatoes
- Our Favorite Cranberry Sauce
- Or see all of our Thanksgiving recipes!
More Holiday Recipes

Best Roasted Turkey We've Ever Made
- PREP
- COOK
- TOTAL
Use our recipe for roast turkey with amazing flavor, soft and tender meat, and crispy skin. We highly recommend it to anyone preparing a Thanksgiving turkey! See the article above for thawing and trussing tips.
We brine and air-dry our turkey; here’s our turkey brine recipe to see how we do it. Air-drying in the fridge the night before we roast also helps with getting that crisp, golden brown skin. You can also make an excellent gravy using the pan drippings (highly recommended).
Watch Us Make the Recipe
You Will Need
Turkey1 (12 to 20 pound) turkey, thawed, brined (recommended), and trussed
Turkey butter, recipe below
1 large onion, cut into eight wedges
2 carrots, roughly chopped
2 celery stalks, roughly chopped
5 cloves garlic, smashed
8 fresh thyme sprigs
4 sage leaves
2 quarts chicken stock (8 cups or 1.8L)
Herb Turkey Butter1 pound salted butter, softened (460g)
1 teaspoon fine sea salt
1 tablespoon coarse ground pepper (5g)
1 teaspoon Worcestershire sauce or Pickapepper sauce
3 cloves garlic, smashed
1 lemon, zested and juiced
½ cup parsley leaves (14g)
¼ cup sage leaves (7g)
2 tablespoons fresh thyme leaves (5g)
Directions
- Prepare the Turkey for Roasting
1Prep the oven: Preheat the oven to 325°F (160°C) and adjust the oven racks so that the turkey will fit.
2Make the butter: Pulse all the turkey butter ingredients in a food processor until chopped. Scrape down the sides and bottom of the bowl, then pulse a few more times until smooth.
3Prep the roasting pan: Place the onion, carrot, celery, garlic cloves, thyme sprigs, sage leaves, and chicken stock in the bottom of the roasting pan. Set a roasting rack into the pan, suspended above the ingredients.
4Melt some of the butter: Add a quarter of the turkey butter to a small saucepan over low heat. Melt the butter, and then remove from the heat. Set aside.
5Prep the turkey: Place the turkey on the roasting rack. Use your hands to create a pocket between the skin and breast meat. Use a knife or scissors to make a hole where the drums meet the thighs.
6Add the butter: Rub the remaining (unmelted) turkey butter into the pockets under the skin and the holes near the thighs. Massage the butter to create an even layer underneath the skin — this is a messy job, but well worth it for the flavor! I use almost all of the butter. Depending on the size of your turkey, you may only need a portion of it. Alternatively, if you have a disposable piping bag, pipe the butter under the skin and into the holes in the legs, then massage the butter around.
7Brush with melted butter: Flip the turkey over so that it is breast-side-down on the roasting rack. Brush some of the melted butter all over the back of the turkey. Flip it back so that the breast side faces up, and then brush the remaining melted butter all over the top (all this butter will make the turkey incredible). Lightly season with salt and pepper.
- Cook the Turkey
1Roast the turkey: Roast for 14 minutes per pound, checking and basting with the fat on top of the broth in the pan every half hour. If the liquid level drops too low in the pan, add some water to replace it. I rotate the pan every hour for even browning. For a 15-pound bird, it will take 3 ½ hours.
2When the turkey is about two shades lighter than you want in color, tent it with foil and roast until an internal thermometer inserted into a few areas (breast and thighs) reads 160°F (71°C). Check both sides of the thickest part of the thigh, away from the bone. As a visual cue, you want to roast until the juices run clear from the thigh after piercing it with a knife.
3Let it rest: Remove the turkey from the oven and let it rest for 30 minutes to 1 hour before carving. To keep warm after resting, place it in an oven set to 200°F (90°C). To prevent it from drying out, loosely cover it with foil.
Adam and Joanne's Tips
- Unsalted butter: When making the turkey butter, if you have unsalted butter instead of salted, add an additional teaspoon of fine sea salt to the butter mixture.
- Helpful equipment: Brine bag or 5-gallon bucket (optional if brining), large roasting pan with rack, disposable piping bag, food-grade nitrile gloves (for massaging the butter), basting/pastry brush, and turkey baster.
- Nutrition facts: The nutrition facts provided below are estimates. We have used the USDA database to calculate approximate values. Calories and fat are likely a bit off because much of the butter melts down to baste the bird and eventually ends up in the bottom of the pan.


Wow! The brining made a world of difference. The juiciness and savory flavor of the turkey was sensational. Makes me want to make turkey year round. The brown meat was also sooo good. Thanks for the recipe. Game changer
So happy that you gave the recipe a try! Thank you for coming back and letting us know how it worked out.
Absolutely fantastic! I followed your brine recipe and this roast turkey recipe exactly as written with a 15 pound fresh turkey from Aldi. I’ve followed Ina Garten’s herbed butter under-the-skin recipe in the past, which was very good – but this was GREAT. My guests could not stop raving about it! Thank you!
Whoo hoo, Thanksgiving 2025!. (22lb Turkey) I followed the recipe to a T. I Brined the turkey for 2 days, made the butter, applied as indicated. Also made the gravy. It was ALL a hit! It turned out very juicy as promised. Very aromatic, and loved the natural herb flavor. Next time I (might) add just a smidgen of garlic salt to the turkey and possibly the gravy as well just to make everything pop just a bit. Other than that I wouldn’t change a thing. Thank you for sharing this recipe
Yay! Thank you so much for coming back to leave a review. We are thrilled that you loved it! 🙂
This recipe is amazing. Ì followed it exactly as written. Everyone loved it! I will never do a turkey without brining. THANK YOU