
This is the best pie crust recipe I’ve ever used! I’ve been using this recipe for flaky pie crust for over 10 years and haven’t looked back. Don’t miss the helpful video that walks you through every step for guaranteed success.
My favorite foolproof pie crust recipe guarantees perfect results every time. It’s so easy to roll out, and your pies will have a crust with the most wonderful light and flaky layers.
This easy recipe works beautifully for single or double crust pies, both sweet and savory. We recommend this pie dough for almost all the pie recipes on Inspired Taste. This is definitely a keeper! For another option, we love this graham cracker crust recipe, too!
Key Ingredients
- Flour: I use all-purpose flour in this pie crust recipe and get consistently great results.
- Cold Butter: You want to use very cold butter when making pie crust.
- Salt: Use salt, even when making pie crust for sweet pies. It makes the crust taste amazing.
- Sugar: Is optional, but if I’m making sweet pies or even a quiche, I use it. We only add a tablespoon, which doesn’t really make the crust taste sweet, its more for balancing the flavor of the flour and butter.
- Cold water: Use icy cold water when you make pie crust.
Find the full recipe with measurements below.
The Secret to the Best Pie Crust
The secret to the best flaky, tender pie crust is a technique I learned from Cooks Illustrated and Kenji López-Alt, and I will be forever grateful! It all comes down to one simple step: coating a portion of the flour with cold butter before adding in the rest of the flour. This is the key to getting a perfectly light and flaky crust every time.
How It Works: Gluten is what gives dough its structure. It forms when you mix flour and water. While we need some gluten, too much of it will make your crust tough and dense.
My tried-and-true pie crust recipe first mixes a portion of the flour with the cold butter. I like to think of this as giving the flour a “butter raincoat.” This coat makes it difficult for the flour to absorb water, which prevents too much gluten from forming. Less gluten means a flakier and more tender pie crust.
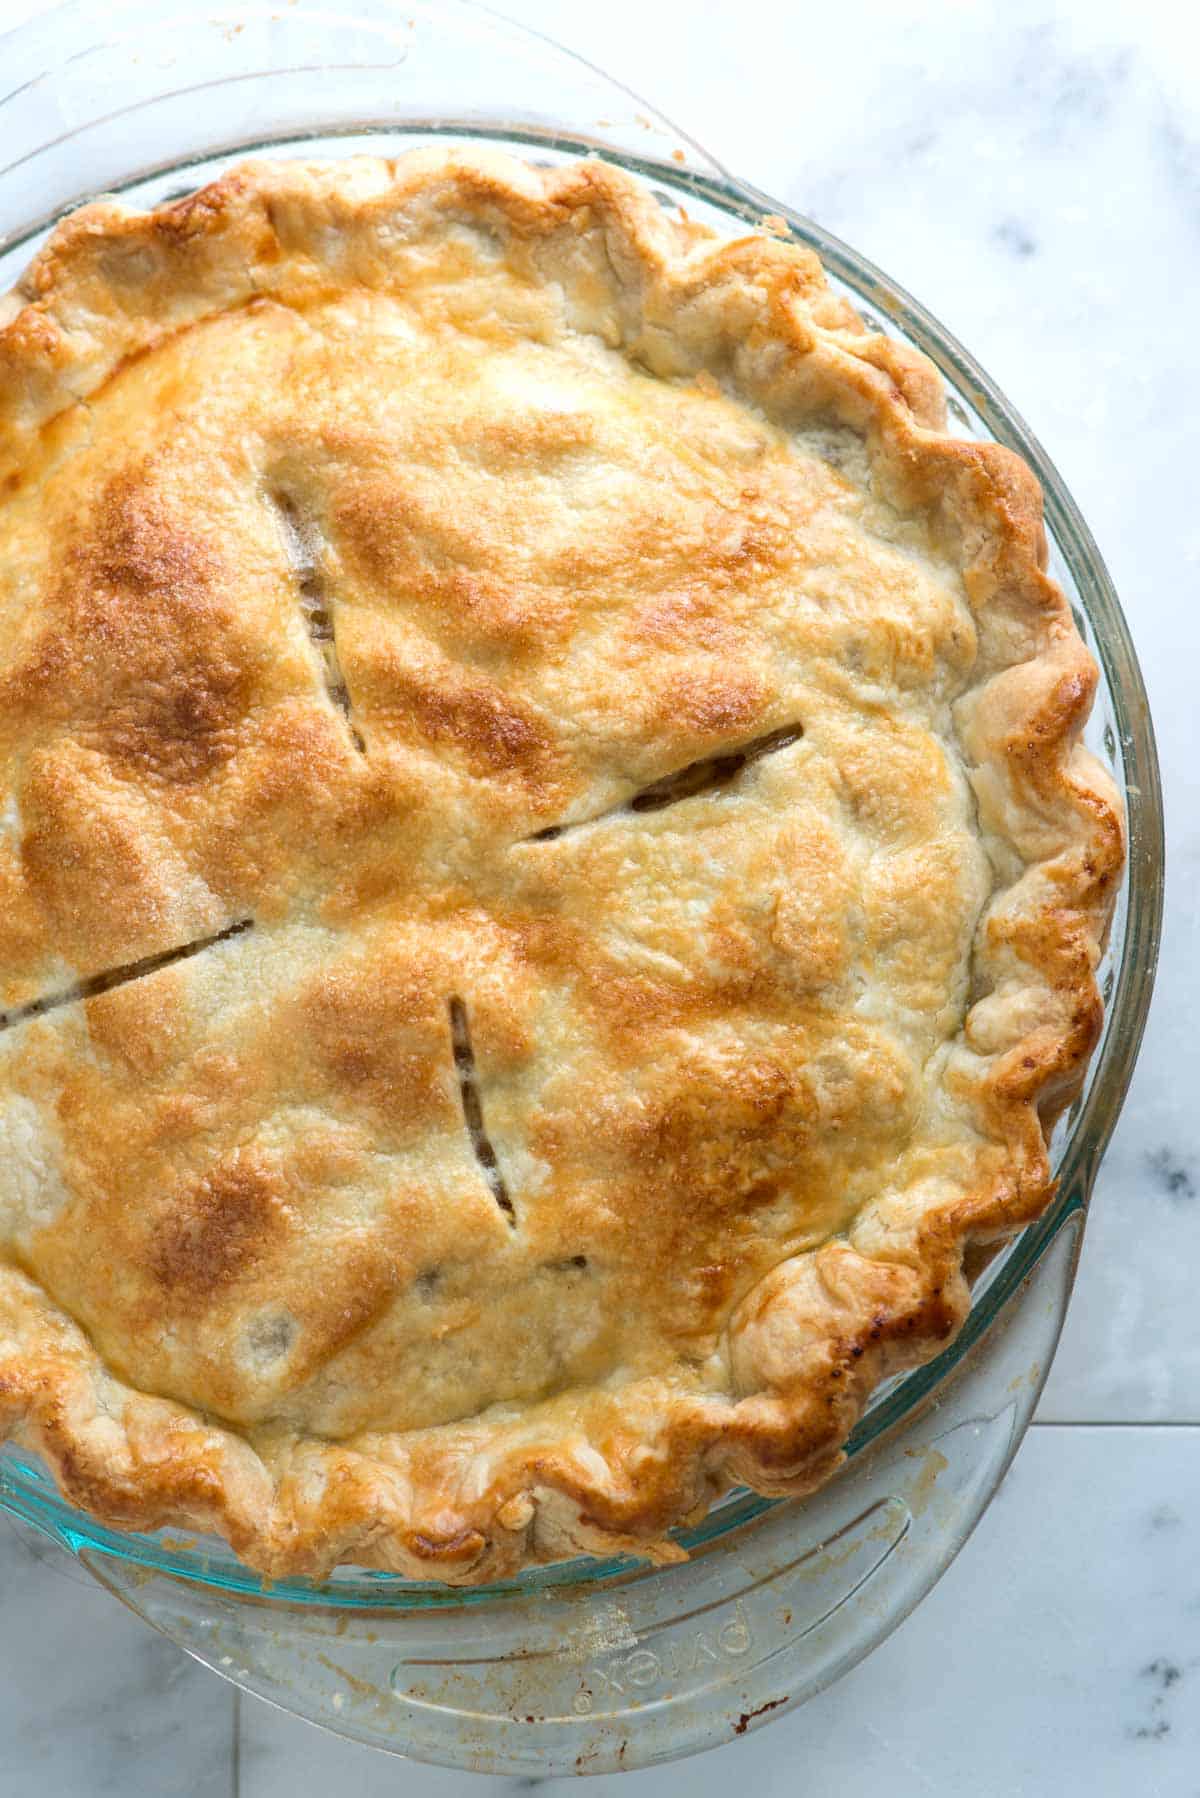
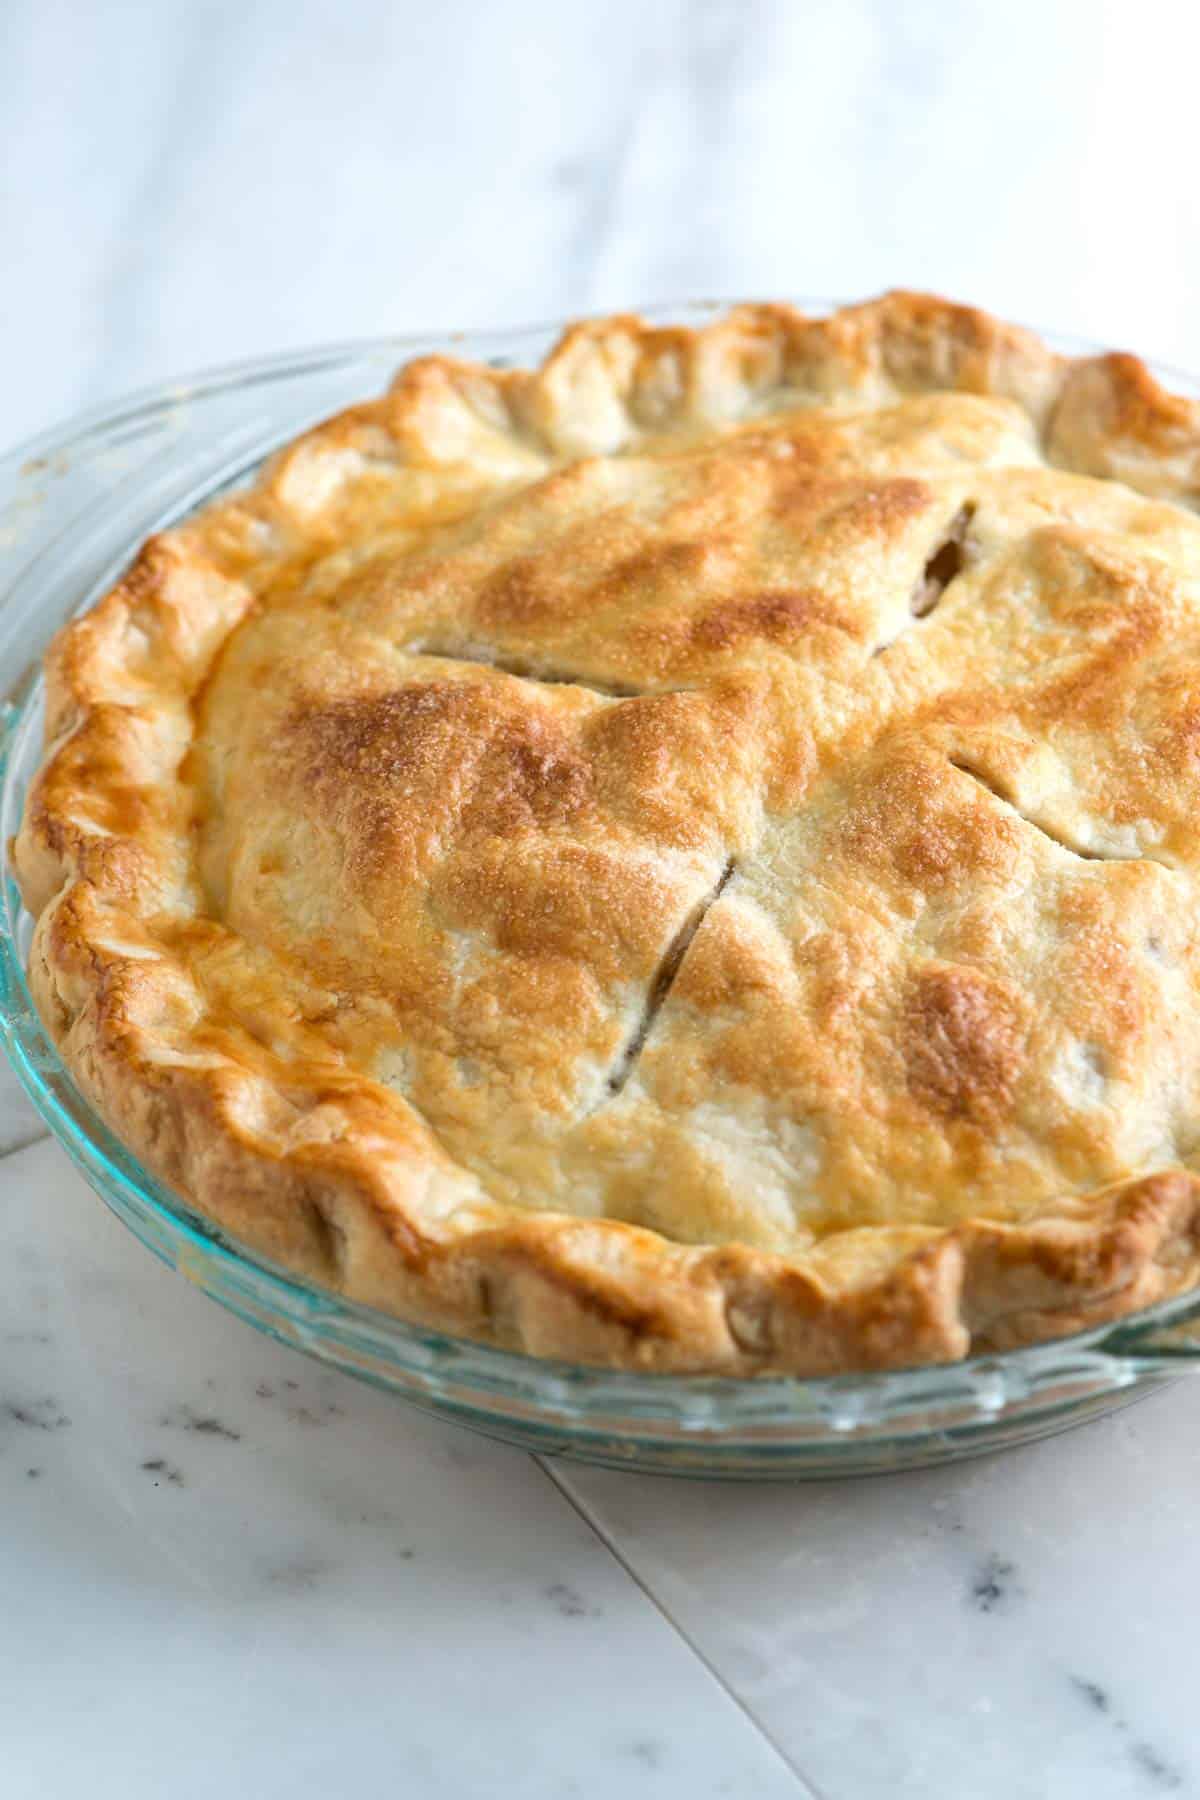
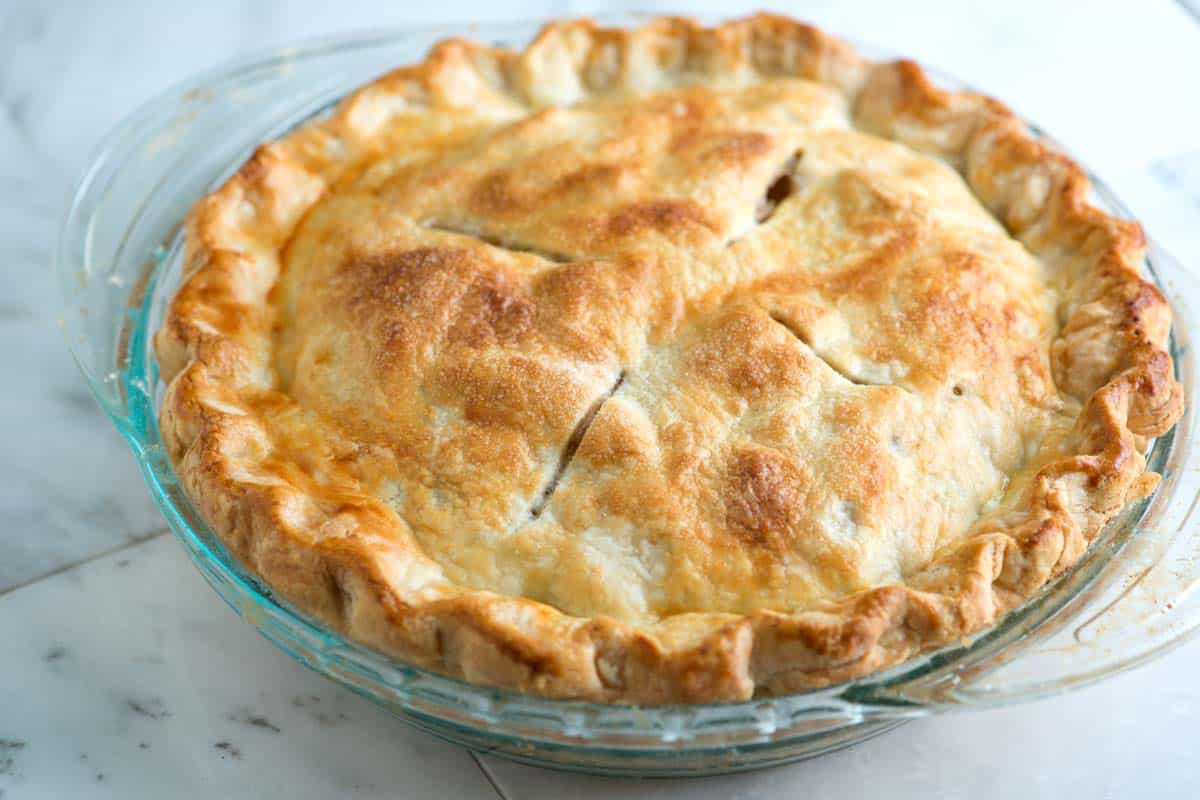
The Result: A great pie crust is light enough to flake, yet it’s strong enough to hold up to juicy fillings without turning soggy. It isn’t crumbly. Instead, the crust is made of long, thin layers of dough, as you can see in the photo below.


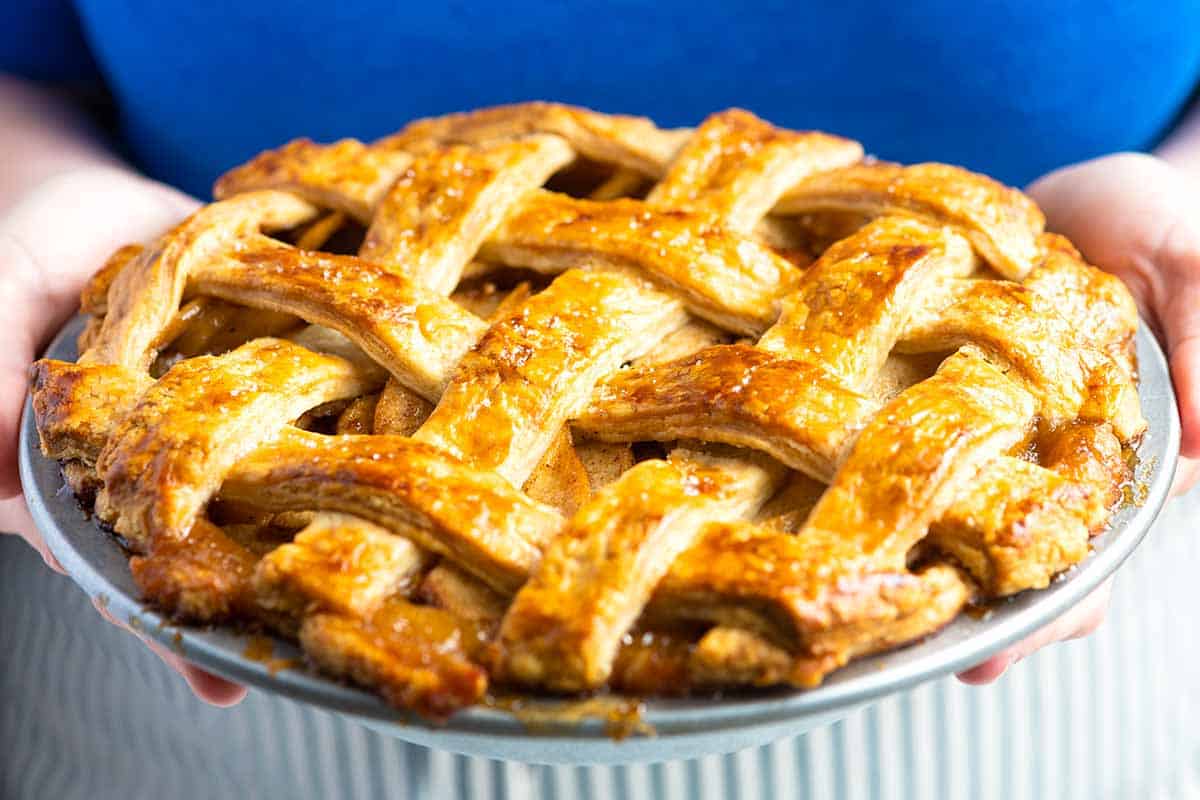
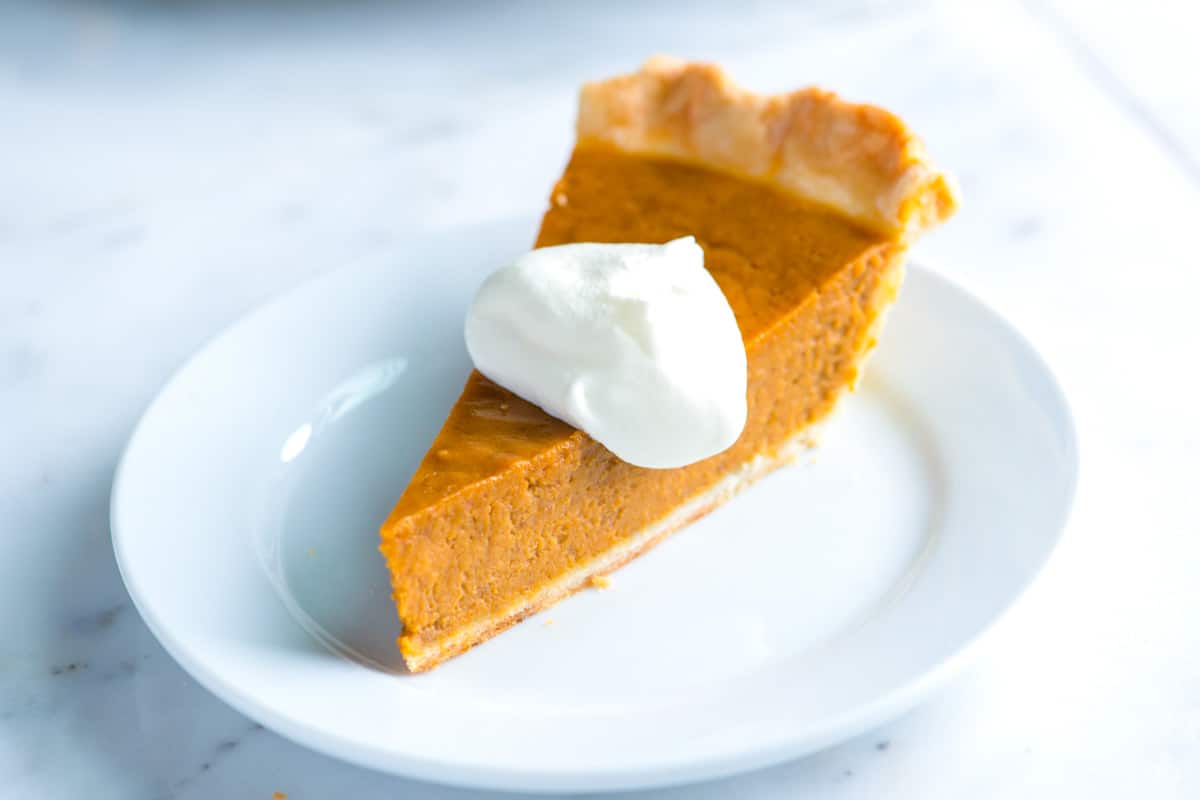
For more evidence of this crust in action, see how amazing this crust is when you look at my recipe for Apple Pie with a lattice crust. The dough rolls out so nicely and makes it easy to add a beautiful lattice top. Or, if you’re planning on making a custard pie, take a look at our Sweet Potato Pie, this Pumpkin Pie, or our favorite Coconut Cream Pie. In each case, the bottom of the crust turns a beautiful golden brown and holds up so well against the wet filling.
How to Make Pie Crust
Here are a few tips to help you make the perfect pie crust using my favorite technique. Don’t forget that there is a quick recipe video below that walks you through the whole process!
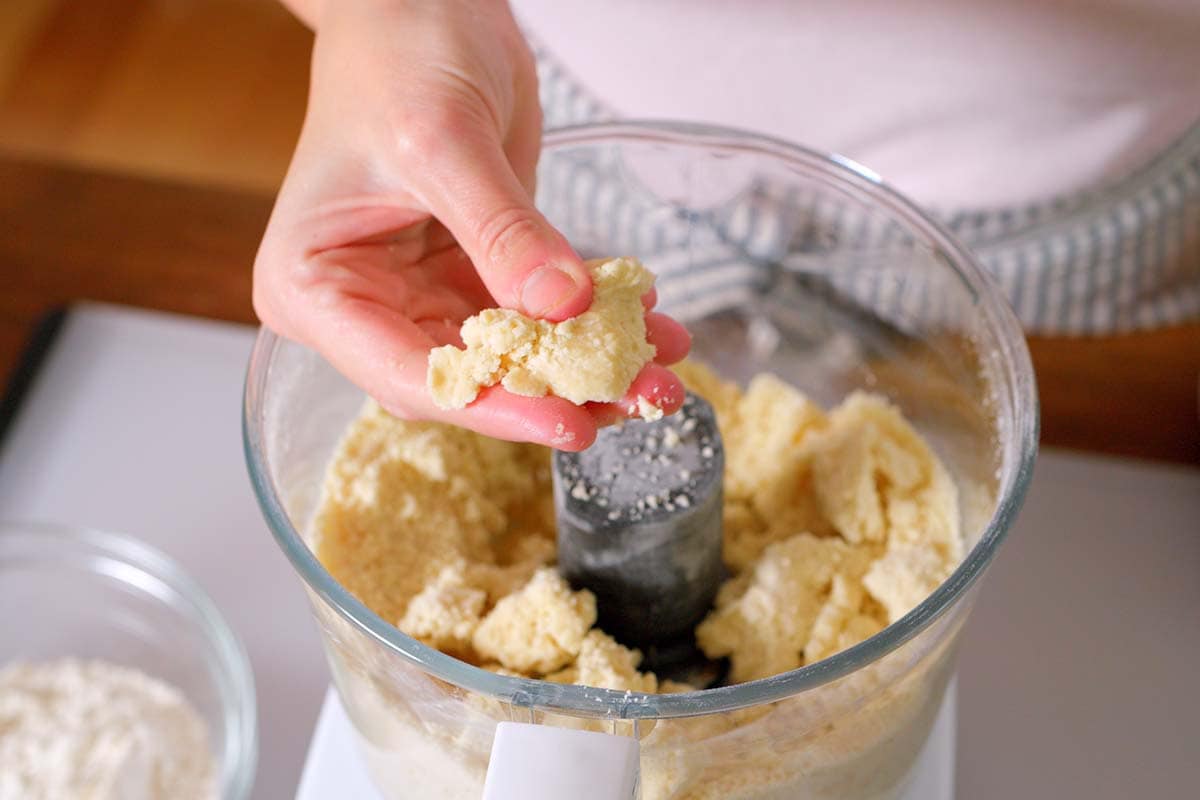
Tip 1: Use a food processor for speed and ease. My food processor makes this crust quick and easy. First, add a portion of your flour, along with the salt and sugar. Pulse to combine, then add your cold butter. Continue to process until the flour is well coated with the butter and turns a faint yellow color from the butter.
At this point, you should also be able to press the mixture together with your fingers, and it should hold its shape. Now that you have added “butter raincoats” to some of your flour, you can pulse in the remaining flour until the mixture is crumbly (guaranteeing the perfect amount of gluten for your crust).

Tip 2: Add water with care. The final step is to bring the dough together with cold water. I do this by hand, starting with about 4 tablespoons and then adding more water one tablespoon at a time as needed. Mix with your hands just until the dough holds together. It’s okay if you have a few loose crumbles.
Over the years, I’ve learned that the amount of water needed can vary a lot, mostly due to your climate. For example, someone living in a humid place like Florida might need less water than someone in a dry desert environment. That’s why I always recommend watching our recipe video so you can see the exact texture we’re aiming for.
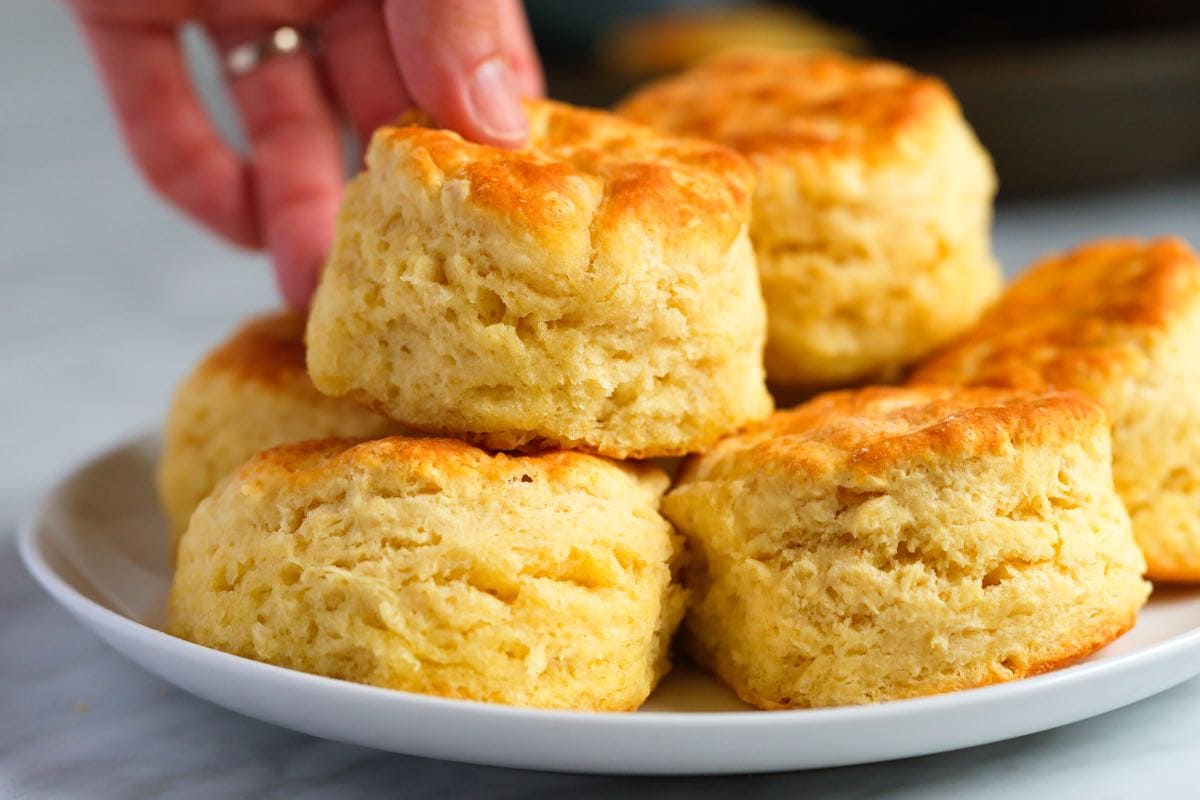
Tip 3: You can do it by hand, too! If you don’t have a food processor, you can easily make this pie crust by hand. I recommend using a pastry cutter to cut the cold butter into the flour. It’s a great tool to have, and it works for other recipes like biscuits and scones (like blueberry scones).
You’ll follow the same basic method: combine a portion of the flour with the butter, then add the rest of the flour and the cold water to bring it all together. The result will be just as flaky and easy to roll out! In our video, I show how I make this in a food processor and by hand to help you out.

My Favorite Pie Recipes with this Crust
I love this butter pie crust recipe because it works for so many of my favorite desserts on Inspired Taste.
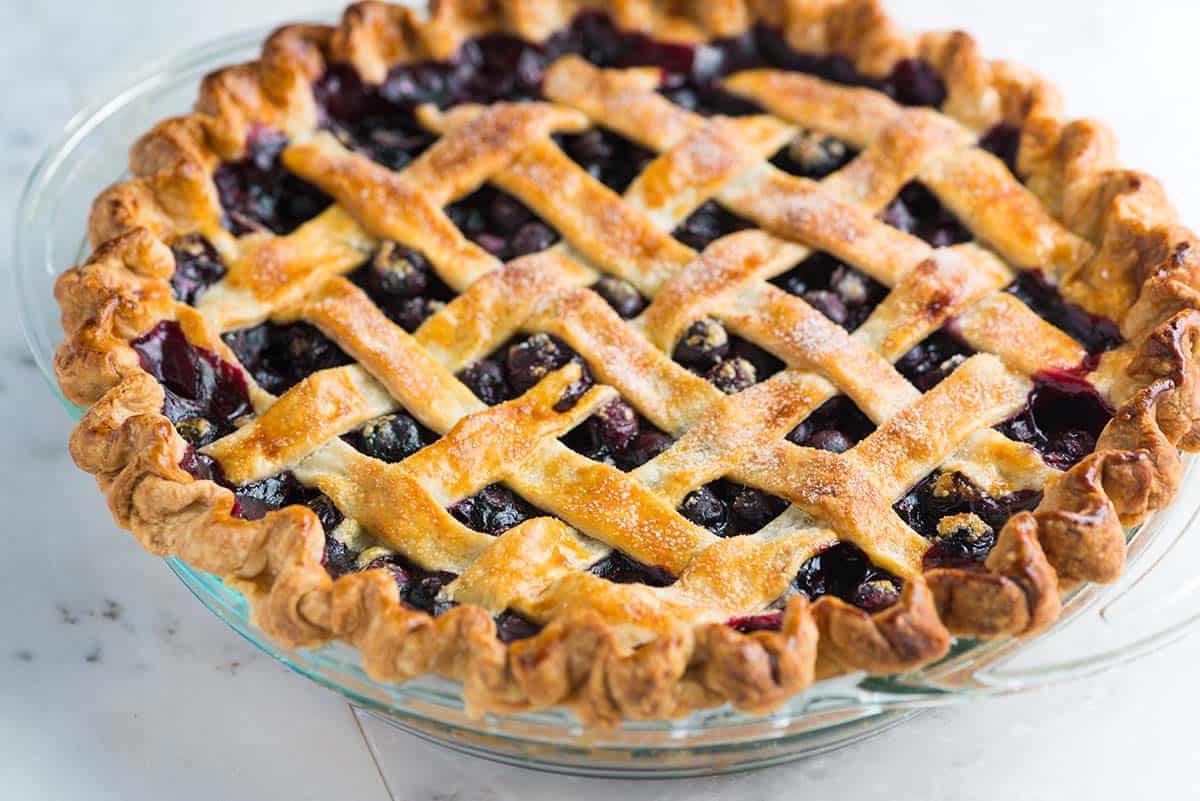
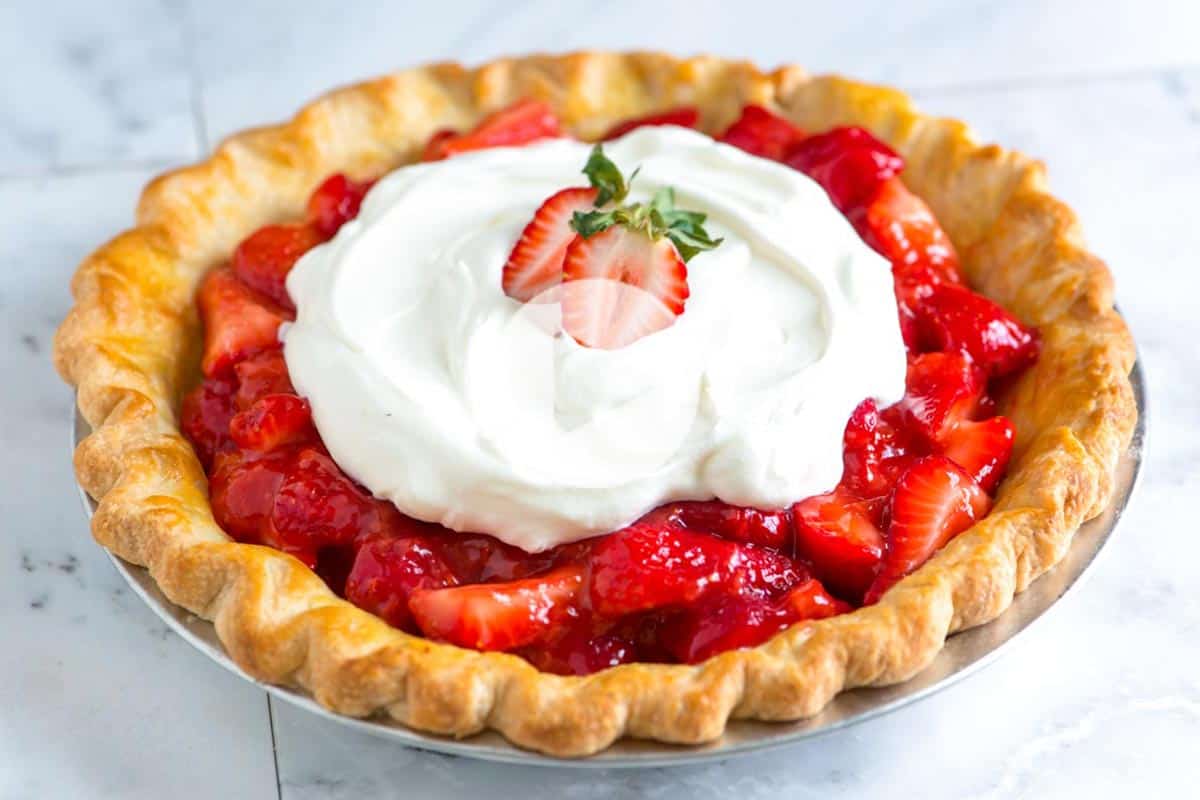
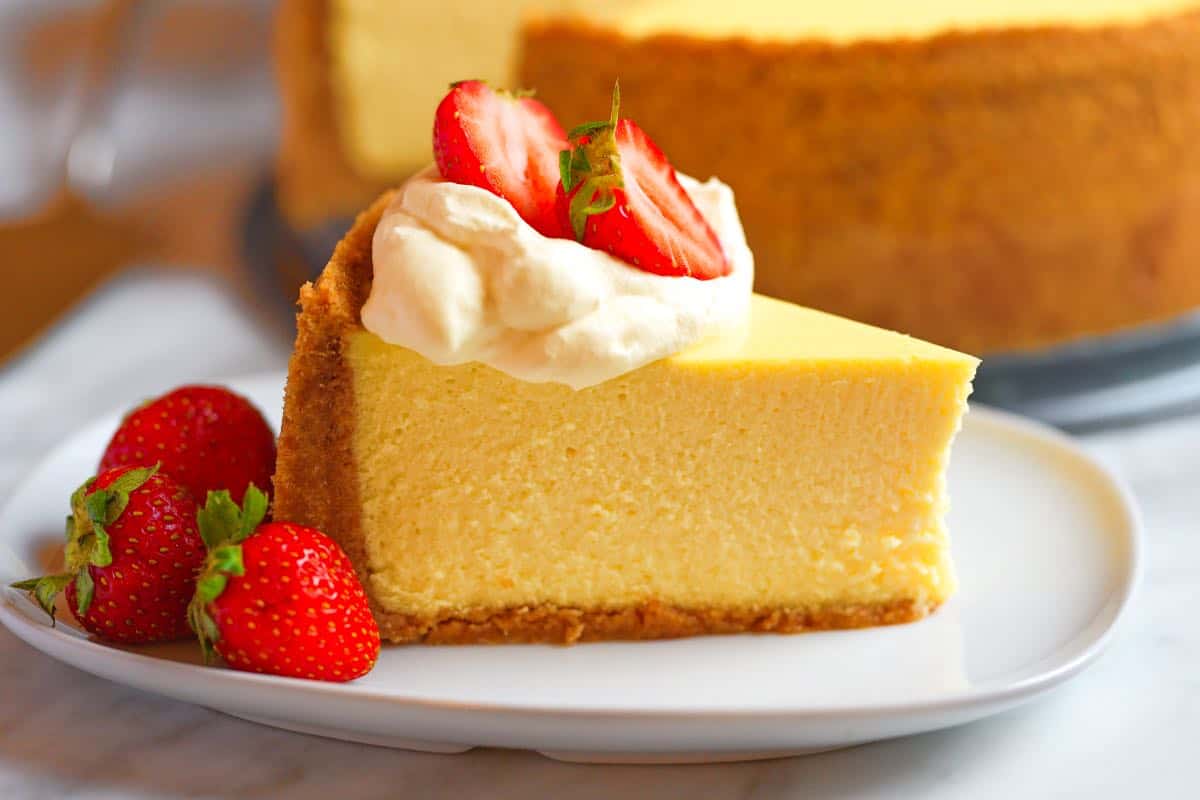
It’s perfect for classic fruit pies that need a sturdy, flaky base, like my Homemade Blueberry Pie, my favorite Apple Pie, and this delicious Cherry Pie. It’s also perfect for pies that are filled after the crust is baked, like my Fresh Strawberry Pie or this Coconut Cream Pie.
This crust also holds up beautifully to wet fillings, making it ideal for holiday pies like my Easy Pumpkin Pie and Sweet Potato Pie. It bakes up golden brown and never gets soggy. Finally, you can even use this versatile dough for free-form pies like my Easy Apple Tart. It’s so easy to roll out and shape for a beautiful, rustic look. Happy pie making!

Easy Flaky Butter Pie Crust
- PREP
- TOTAL
Of all the pie crust recipes we have tried, this makes the most consistent dough. It’s also a dream to roll out. Using a food processor in this recipe eliminates variability. If you have one, use it. With that said, you can do this method by hand. Directions are provided below for using a processor and by hand.
When measuring the flour for this pie crust, either weigh it or use the “spoon and level” method: Fluff the flour, spoon it into the measuring cup, and level off the top with a flat edge. You can see me do this in our video!
Watch Us Make the Recipe
You Will Need
2 ½ cups (325g) all-purpose flour, spooned and leveled
1/2 teaspoon fine sea salt or 1 teaspoon kosher salt
1 tablespoon sugar, optional
1 cup (230g) very cold unsalted butter, cut into 1/2-inch cubes
6 to 8 tablespoons ice water, or more as needed
Directions
- Making Pie Dough in a Food Processor
1Combine the first portion of flour and butter: Add 1 ½ cups of flour, salt, and sugar to your food processor. Pulse a few times to combine. Next, scatter the cold butter cubes over the flour mixture. Process for about 15 seconds, until a dough or paste begins to form and there is no dry, uncoated flour left. The flour should take on a pale yellow color, and you should be able to press the dough together.
2Add the remaining flour: Scrape down the sides of the food processor bowl to redistribute the mixture. Add the remaining 1 cup of flour and pulse 4 to 5 times. The dough should look broken up and a little crumbly, with the flour evenly distributed (see our video for reference).
3Add water and bring the dough together: Transfer the mixture to a medium bowl. Sprinkle 4 tablespoons of ice water over it, and use a rubber spatula to press the dough into itself. The crumbs should start to form larger clusters. To check if it’s ready, pinch a small amount of dough; if it holds together, you’re good to go. If it falls apart, add 2 to 4 more tablespoons of water and continue to press until the dough comes together. The amount of water needed depends on the level of humidity in your kitchen. Don’t worry if you need to add more than we do in our video.
4Form and chill the dough: Remove the dough from the bowl and gently form it into a ball on a clean surface. Cut the ball in half, then flatten each half into a disk. Wrap each disk tightly in plastic wrap and refrigerate for at least 1 hour, or up to 3 days. You can also freeze the dough for up to 3 months (just be sure to thaw it overnight in the fridge before using it).
- Making Pie Dough By Hand
1Combine the first portion of flour and butter: In a medium bowl, add 1 ½ cups of flour, salt, and sugar. Whisk to combine. Scatter the cold butter cubes over the flour, then briefly mix with a fork or spatula to coat the butter. Using a pastry blender, cut the butter into the flour until the mixture has a coarse, mealy texture, similar to breadcrumbs. This should take about 1 to 2 minutes.
2Add the remaining flour: Scatter the remaining 1 cup of flour over the butter and flour mixture. Continue to work the mixture with the pastry blender for about 20 seconds, or until the flour is evenly distributed. The dough should look crumbly, with some pea-sized pieces of butter still visible (see our video for reference).
3Add water and bring the dough together: Transfer the mixture to a medium bowl. Sprinkle 4 tablespoons of ice water over it, then use a rubber spatula to press the dough into itself. The crumbs should start to form larger clusters. To check if it’s ready, pinch a small amount of dough; if it holds together, you’re good to go. If it falls apart, add 2 or more tablespoons of water and continue to press until the dough comes together. The amount of water needed depends on the level of humidity in your kitchen. Don’t worry if you need to add more than we do in our video.
4Form and chill the dough: Remove the dough from the bowl and gently form it into a ball on a clean surface. Cut the ball in half, then flatten each half into a disk. Wrap each disk tightly in plastic wrap and refrigerate for at least 1 hour, or up to 3 days. You can also freeze the dough for up to 3 months (just be sure to thaw it overnight in the fridge before using it).
- Rolling Out Pie Dough
1Prepare the dough: Remove one of the dough disks from the refrigerator and let it sit at room temperature for at least 5 minutes. This makes the dough less stiff and easier to roll. Lightly flour your work surface, the top of the dough, and your rolling pin.
2Roll the dough: Using your rolling pin, roll the dough, turning it a quarter turn after every other roll, until you have a circle about 12 inches in diameter (perfect for a 9-inch pie dish). Periodically check to make sure the dough isn’t sticking to your work surface, and add a small amount of flour underneath as needed. You can always check the size by inverting your pie dish over the dough (you should have about a 1-inch edge all the way around).
3Transfer to the pie dish: To move the dough to your pie dish, carefully roll it around your rolling pin, then unroll it over the dish. Gently press the dough down into the dish, making sure it lines the bottom and sides without pulling or stretching it.
4Crimp the edges: Fold any overlapping dough underneath itself to create a thicker, 1/4-inch border that rests on the lip of the dish. To crimp, press the pointer finger of one hand against the inside of the dough while gently pressing with the knuckles of your other hand from the outside.
5For a double-crust pie, don’t crimp the bottom crust. Instead, roll out your second dough disk, fill the pie, then place the top crust over the filling. Trim the edges of both crusts and then crimp them together as described above.
6Chill the crust: Slide the unbaked pie crust into the refrigerator and chill for at least 30 minutes.
- How to Blind Bake Pie Crust for Single Crust Pies (Quiches & Cream Pies)
1Preheat the oven: While the unbaked pie crust is chilling, preheat your oven to 375°F (190°C).
2Bake the crust (phase 1): Pierce the bottom of the chilled crust all over with a fork. Crumple up a sheet of parchment paper in your hands, then uncrumple it and use it to line the crust. Fill with pie weights, dried rice, or dried beans. Bake for 15 minutes. This is where you would stop for a partially-baked crust, used in recipes that will bake the pie with a filling later on.
3Bake the crust (phase 2): For a fully baked pie crust, carefully remove the crust from the oven and lift out the parchment paper and weights. Return the crust to the oven and continue to bake until it is light golden brown, about 15 to 20 minutes more. Set aside to cool completely before filling.
4Optional shiny, golden crust: For a shiny, golden finish, prepare an egg wash by whisking one egg yolk and 1 tablespoon of cream together. Lightly brush the bottom and sides of the crust, then bake for another 5 to 8 minutes, or until the crust is dry and shiny. Allow the crust to cool completely before filling.
- How to Make a Double Crust Pie
1Note: Oven temperature and bake time will vary based on your specific pie recipe. Always refer to the recipe you are following. As an example, we use 400°F for our homemade cherry pie.
2Add the top crust: Roll the bottom crust out and place it into your pie dish as directed above. Then, roll out the second dough disk and place it over the filled pie. Use a knife or kitchen scissors to trim the dough so that it overhangs the edge of the dish by about 3/4-inch. For a lattice crust, see How to Make Lattice Pie Crust.
3Seal and crimp the edges: Fold the edges of the top crust underneath the edges of the bottom crust, pressing to seal them together and create a thicker border that rests on the lip of the dish. Crimp the edges as desired. Refrigerate the pie for at least 30 minutes before baking.
4Finish and bake: Just before baking, make an egg wash by whisking an egg yolk and 1 tablespoon of cream together. Use a pastry brush to coat the top crust lightly, then sprinkle with about 1 tablespoon of sugar. Cut 3 to 4 slits in the top of the pie to vent steam. Bake as directed by your specific recipe.
Adam and Joanne's Tips
- Storing pie crust: Wrap well with plastic wrap and keep in the fridge for up to 3 days. To freeze it, follow the crust recipe and shape the dough in your pie dish. Freeze it uncovered until it’s completely solid. Then, carefully transfer the frozen crust into a freezer-safe bag or wrap it well in foil and plastic wrap. Freeze for up to 3 months. When you’re ready to use it, let it thaw in the refrigerator for a couple of hours before blind baking.
- Recipe inspired by this easy pie dough. Cook’s Illustrated and Kenji López-Alt inspire the method for creating the flour paste. Their original recipe also includes vodka, but we do not add this ingredient.
- The nutrition facts provided below are estimates.


How do I make a single pie crust? By the way I make your chocolate chip muffins almost every week. They are delicious and so easy to make.
Hi Katherine, You can cut the recipe in half (or make the entire recipe and save half in the freezer).
K
So good!
This recipe has changed my baking life! I have avoided baking pies and tarts because I didn’t want to struggle making a crust that may or may not turn out light and flaky. With this food processor method, you have not only given me an easy, tasty, idiot proof recipe, it’s the type of crust that a baker’s dreams are made of. Soooo flaky and works with both savory and sweet dishes. Thank you for this absolutely perfect recipe. I am making multiple batches and freezing them for future use. Heading to the store now for more flour!
Yay! You have made our month with this review! 🙂
Wish there was an actual “by hand” section. The by hand section here says to then use a tool, a “pastry blender”. Maybe in the future just also add an additional section to help those who have to do it truly by hand. Crust didnt come out smooth, maybe I didnt mix it enough but mine looked good when it was chilling so I am not sure.
Hi Sophia, You can rub the butter between your hands, but this does risk warming it up more than if you were to use the pastry cutter. I use a pastry cutter for my scones and drop biscuits (I think mine was around $10, so it is a great tool to add to your kitchen if you bake a lot).
I used to use a large knife to cut my butter into the flour before I got a pastry cutter. I definitely second that they’re great to have but the knife worked great when I didn’t. The bigger blade keeps your hands from melting the butter since its temperature sensitive to make a good flaky crust.
I doubled this crust recipe for two 10 inch quiches I was making for a party. Somehow, my initial dough was not coming together at all and it was clear there was not enough butter in there to bring it togther in the food processor so I added another 1/2 cup of butter. I watched the video and decided maybe because my flour was compacted it was more flour??? It defintiely seemd like way too much flour to butter (operator error I am sure lol). I have no idea but I thought my measurements were correct, so weird. I had to add quite a lot of water but finally had it come togther. I was only able to chill to balls for 40 minutes and roll out (time crunch). It worked fine and I blind baked for 20 min at 400, then made my quiches, with another 35 minutes in the oven. Anyway, this crust was amazing, the flakiest crust I have ever made next to puff pastry. I was astonished. Even messed up it was still great. Thank you!
Hi Hillary, I am so happy the crust worked out in the end! I love the spoon and sweep method for measuring my flour. You can stir the flour in its container, then lightly spoon it into your measuring cup. Take a flat edge and sweep any excess flour from the top of the cup. This should get you much closer to the grams measurement provided in the recipe.
Thanksgiving was a HUGE hit with this pie crust recipe! Absolutely the best ever pie crust I have ever eaten. Thank you for all the fabulous tips and tricks in your recipes. Your communication within the recipe is definitely a life saver for those of us who have spent years as office employees and not as a chef. I have learned so much from watching your videos and reading the recipes carefully. A total game changer for me as I hate being in the kitchen. Now I find I am having fun making meals and desserts for my friends and family. Thank You so much!
That’s so wonderful, Connie. Thank you so much for coming back and letting us know!
This is an amazing pie crust. Always turns out well 😁 ❤️
My mom always made great pie crust but I never took the time to learn from her. I tried only twice to make my own but it didn’t come out. I used this recipe just 2 days ago and it turned out fantastic! I asked for a food processor for Christmas so I could try making pie crust and puff pastry. I used my pie crust to make pie crust cookies like mom made for us. Instead of only butter and cinnamon sugar, I also added nutmeg, allspice and cloves. OMG!! So good and addictive!! I will be making my own pies from now on. No more store bought.
I used this recipe for a Chicken and Mushroom pie as an alternative to short crust. I was amaized how easy it was to make.it and it turned out beautifully, light, flaky and very tasty. This will be my stock pie pastry and look forward to the Apple season. Six stars!!
Wonderful! Thank you for coming back to let us know.
I tried your it, taste good but the problem is it shrinksnso much !.
Any way around that !?
Hi John, I am sorry you are having trouble with shrinking. Was your pie crust cold before baking, and at what temperature was it baked? Also, building up the edge (where you crimp the crust) helps a lot with preventing shrinking.
I used this recipe for my pot pie, and it was really delicious!! Thank you for this tasty recipe, with really easy to follow instructions!
Wonderful! You are so welcome 🙂
I love this recipe! It came out very flaky and buttery I made this for a chicken pot pie. Although It was more of a thin crust and was a little hard to roll out coming out from fridge, it kept cracking from middle, so I think it needs more time to get soft. I just used my palm to press it down slowly and it eventually did roll out but it was falling apart a little, I will use more water next time to see if that helps.
My pie crust didn’t turn out. I did exactly like the video showed and it turned out tough and chewy. I don’t know what I did wrong. It wasn’t flaky at all.
Hi Angela, I am sorry it did not turn out as expected! Was your crust easy to roll out?
Thank you so much for this recipe. I made my first pie crust using your recipe and the results were perfect! It was on my bucket list to do lol. I watched your video twice before making.
My first crust that came out perfect! I’m 54 and have always either over flour or over work. The video was extremely helpful . My pumpkin pie was delicious! Thank you! And Merry Christmas!
Can I substitute the butter with vegan butter?
Hi Monica, I’ve only ever used real butter in this recipe. I believe other commenters may have tried vegan butter, but I am not sure what brand. My guess is that it will work just fine, but it would be a bit of an experiment on your end since I’ve not actually tested it myself.
Am I able to use this double crust recipe for 10″ pie?
Hi Viola, That’s probably the max. I believe the pie dish in our photos is technically a 9.5 inch. If you are concerned you will not have enough dough for the edges and crimping, you can do 1.5 times the recipe. You’ll have extra, but it may be worth it.
This crust is amazing. The only issue I have had is that it shrinks down a TON. Like 1-2″ Any tips to keep it from shrinking so much? I bake it from cold and use pie weights.
Hi Adrianne, Have you tried building up the edges (where you crimp) a bit more than normal? Adding an extra strip of pie dough to the edges to build it up can really help.
this is the best pie crust recipe I have ever used, so easy to make. I have made my first from scratch chicken pot pie and apple pie, using this crust. the crust is so delicious.
This crust was very tough, not at all tender. Somewhat flakey.y. I will return to my regular butter crust. I have been making pies for over 60 years and am often complemented on my crusts.
Hi Laurie, Thanks for coming back and we are sorry you did not have as much success as others with this recipe.
If I’m making a pumpkin pie, doe I have to blind bake it first?
It is up to you (or the recipe you are following for pumpkin pie). Personally, I do not blind bake my crust for pumpkin pie.
Can I double this recipe? I’m about to make meat pies so I want to make a batch 😊
Hi Jamie, You should be able to, as long as you have a large enough food processor bowl (mine is 14 cups).
I had planned to make a blueberry pie this weekend but realized I had forgotten to buy my usual frozen crusts. Decided to try making my own for the first time and followed this recipe. Oh my gosh! SO incredibly delicious! It turned out perfectly flaky and was not at all difficult to make. I have no idea why I was so leery of making my own crust, but I’m excited to keep doing it now. Thank you for the great tips!
Wow, absolutely a 5 star recipe. I have been making pies for years using lard and shortening and never really happy with them. Following your instructions and ingredients turned out the best pastry ever. Made an apple/cranberry pie with it. Super!!! Thanks for great ideas!
I don’t have a food processor, will pastry cutter work just as well?
Absolutely! Tips for this are above.